Table of contents
Setup Hardware
Shopping List
To build your own voice assistant, you will need at least the following things:
- Raspberry Pi 3b/3b+/4 with Power Cable
- Micro-SD-Card with a min of 16gb
- ReSpeaker 4-Mic-Array
- Zigbee2MQTT adapter, like Texas Instruments CC2531 or ConBee2 or (other compatible adapters)
- Zigbee LED Light Bulb or any other Zigbee device
- Speaker with 3.5mm jack
Setup Raspberry Pi
The easiest way to set up a Raspberry Pi is to use the Raspberry Pi Imager.
Steps:
- Insert Micro SD Card
- Choose OS -> We recommend Raspbian with OS
- Choose Micro SD Card
- Click Button Write
- Done!
You can attach a screen, keyboard and mouse to enable SSH and configure WI-FI connection.
The username is pi and the password is raspberry. You should change the password immediately.
Optionally SSH and WI-FI configuration
If you want to start the Raspberry Pi headless, you can enable SSH and configure the WI-FI connection before starting.
Enable SSH
You only need to create an empty file with the name ssh without any extension in the root directory of the usb stick. Done!
Configure WIFI
Create a file with the name wpa_supplicant.conf in the root directory of the pi. Fill it with the following code and adjust country to your country, for example DE for germany. Also adjust ssid and psk to your network.
ctrl_interface=DIR=/var/run/wpa_supplicant GROUP=netdev
update_config=1
country=<Insert 2 letter ISO 3166-1 country code here>

network={
 ssid="<Name of your wireless LAN>"
 psk="<Password for your wireless LAN>"
}
you can use the command sudo raspi-config for additional setting (e.g : change your time zone, set the language, Keyboard layout etc.)
Read more about a headless setup here.
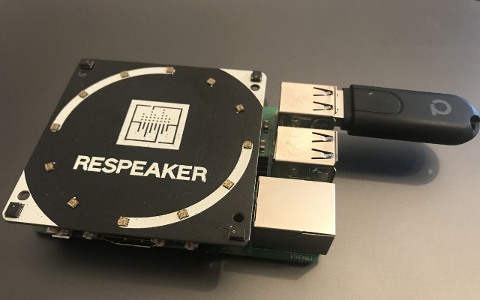
Plugin ReSpeaker and Zigbee Adapter
Attach the ReSpeaker 4-Mic-Array to the Raspberry Pi and plugin the Zigbee Adapter.
Finish!
Congratulations! You mastered the first step to your own Voice Assistant! Go to the next step!